
 The paving was not finished neatly and it just was a very hard area to keep looking neat. There were big rotting sleepers being used as retaining walls and dirt and weeds everywhere.
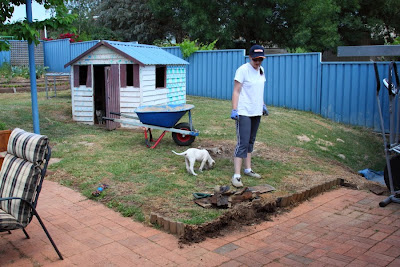

 Hired a dingo (mini digger) for the weekend and moved dirt around filling in the area where the deck used to be.
 We pulled up all of the existing pavers.
 Moved more dirt and the cubby house.
 Built a retaining wall using besser blocks and moved more dirt.
 We then built steps using besser blocks.
 We moved the carport down by the side of the house and cleaned up along the fence by building garden beds and a water feature. We did make sure that we left enough room to drive a vehicle through.
 We rendered the retaining wall and steps. Then we started making our pavers.
 We made our pavers as we went using a paver maker. You can visit the site to learn more. The pavers are made using concrete (mixed ourselves on site) and oxide in whatever colour you like. We used sandstone. You lay the mould in place, pour the concrete in and then level it. When you are happy that you have the concrete levelled and there are no gaps/holes you pull the mould off gently, turn it 90 degrees and place it down next to the last paver and start again. The concrete is not runny so provided you can keep kids, cats and dogs off until the pavers dry it is a pretty simple process.
 While we made our pavers for our patio, Nan and Pop (who were staying with us through the school holidays helping look after Nicholas) worked hard and paved behind our new sheds (we recylced the old pavers from the patio), moved all the wood and tidied up what they could.
 Aren't we so blessed to have such great Grandparents?
 We started laying the pavers around our existing hot water system (hidden behind the screen in the photo below). It is an electric storage system so it is quite big and it sits on the ground.
 Part of the way through our paving we had it replaced with an instant gas hot water system that is wall mounted and gives us more room on the patio.
 Finally lots of hours and sore muscles later (we moved lots and lots of concrete) we finished paving our patio. 65 square metres done. Yay!!!! Hip Hip Hooray!
 Next job was to move the big ugly blue pole. The last owners had a shade cloth attached to these. We didn't want them and decided we would just dig them out. We dug and dug and dug and eventually we got it out.
 Then I built a wall and rendered it.
 Rendering is not so hard except for the bending over and barrowing heavy cement render up the slope. Who needs the gym?
 The gap between the wall and the paving is for the drain. We fixed the issue we had with the water running towards the house by making sure that the paving sloped slightly away from the house.
We had to dig a trench to lay the drainage. We were so sick of digging! I mean really sick of digging. We put this off for a few weekends until we finished the rendering.
 Such a horrible job, you can dig for hours and move barrows full of dirt and it looks like you have done nothing. Even Boss was so exhausted he just had to have a nap.......

I hope you stuck with me through that whole long winded backyard transformation. If you are still interested I will post more over the next week or so. What do you think so far? Did the blue fences scare you away? I promise it gets better.


 I loved the wrapping on this soap, I wrapped in some clear plastic to try and preserve it for a bit longer.


 AFTER
 BEFORE
 AFTER
 BEFORE
 AFTER
 BEFORE
 AFTER
 I didn't end up finishing my assignment but I had fun being creative and playing around with my new old things. Hope you had a great weekend.


 If you said cushion covers from the talented


